
Those interested in this sport, need quite a bit of trad climbing gear. From cams to carabiners, from nuts to tricams. There are unlimited options and a lot of trad climbing equipment so it can be a challenge to create your first set of gear.
Of course, the question is how much gear you even need at the beginning – this is a decision that depends on several factors, from your financial means to your potential worry that you don’t have enough equipment to manage the whole route.
We have collated a few tips and tricks that will help you to start with.
Why do we need hangers during trad climbing?
First of all, to prevent falling. But we also attach a lot of hangers because we’re worried, as opposed to them being necessary. In addition to hesitant body language, irrational actions can also give us away, such as overextended hanging of the rope or fixing weak intermediate protection points as psychological support.
By fixing fewer hangers (to a safe extent of course) and therefore taking less traditional climbing gear, you’ll save weight on your belt as well as the time and strength required for attaching and clipping. If you don’t try to make use of every possible placement option, unstable as it may be, it may actually prevent falls. The problem is that you rarely know where the next reliable placement option will be available.
Important hanger designations
During trad climbing, the brand names are often used for specific types of hangers. To give an overview, the correct designations are listed in the table below.
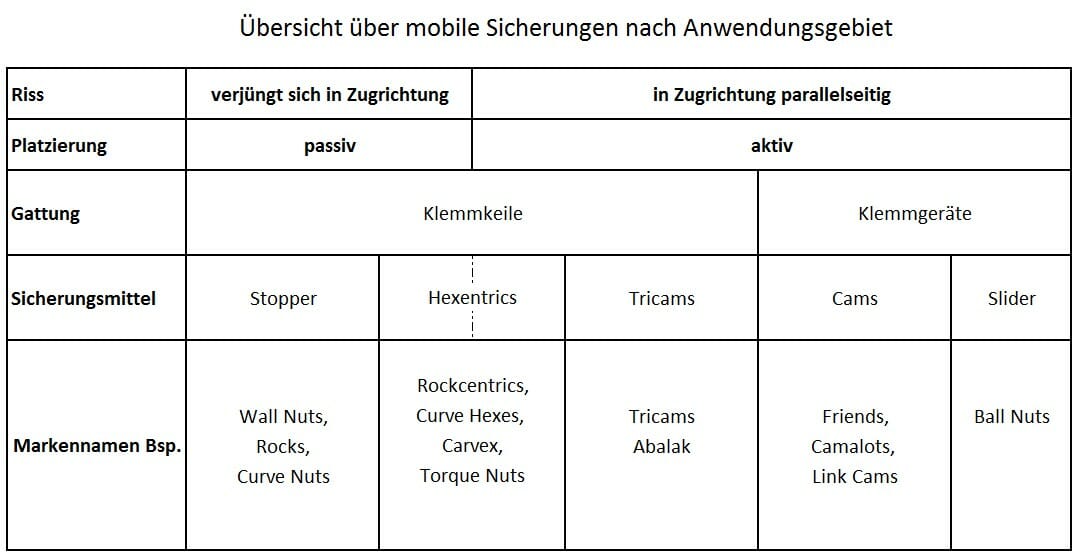
The definitions are based on the categorisation provided by DAV from its Alpine Teaching Plan 5 (2013). In colloquial use, however, we never refer to stoppers but always to nuts. One reason being that there is a nut model by Black Diamond called Stopper. We’ll therefore just use the term nuts in this blog.
When I gathered my first mobile hangers, I went on a major shopping spree – I just wanted to have them all! There are so many different types and each has its own specific advantages that I didn’t want to do without. I wasn’t able to judge which of these were important and which weren’t. But I certainly didn’t want to be ill-equipped on my first trad route.
Active vs. passive belaying during trad climbing
Active hangers
These belay devices are defined by two mobile parts that have two reasons:

that you need for trad climbing
- they’re easier to place and to remove
- they strengthen the holding force in the event of a fall
Active hangers are usually cams or Friends.
Passive hangers
Without mobile parts, passive belays are the easiest and cheapest way there is of belaying. This makes them the perfect basis of your equipment. Passive hangers usually include nuts, Hexentrics, Rocks, Copperheads, Tricams – different names that all describe the same thing. Nuts are available in different shapes and sizes, even in different materials. But the basic design is a metal block with an integrated steel cable – or a sling (Tricams, Hexentrics). This metal block will get wedged in cracks in the rock while the steel cable is used for clipping.
Types of hangers used during trad climbing
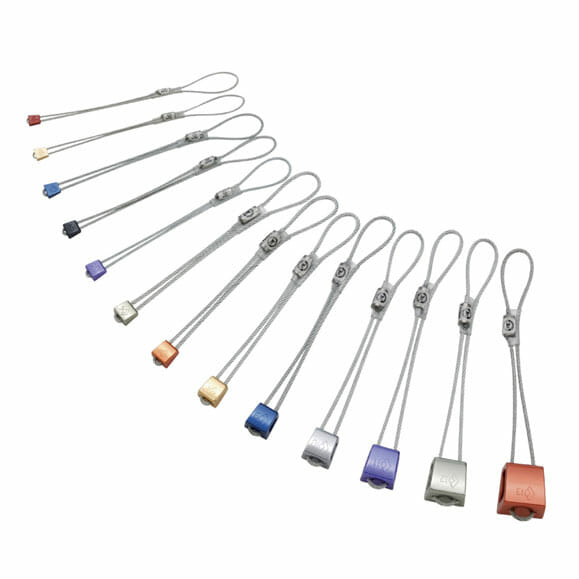
Nuts
Your starter kit should include a basic selection of nuts – around 10 to 14 covering various small sizes.
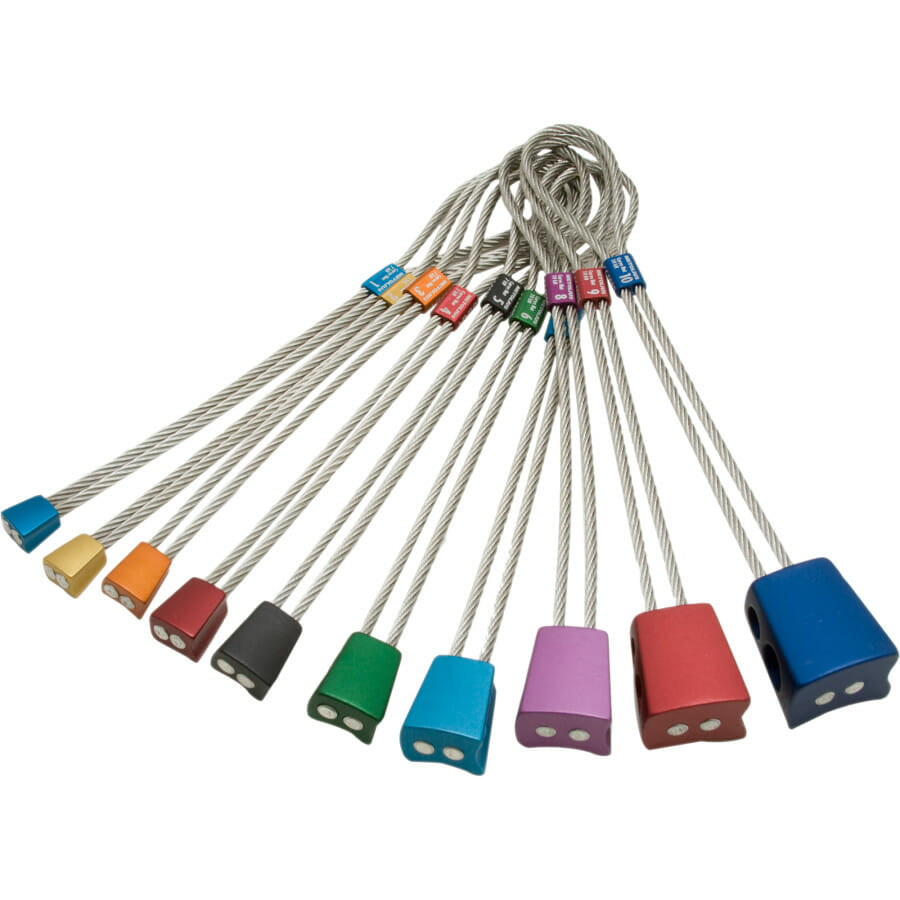
Micro wedges
These are much smaller than conventional wedges and are generally used for technical climbing. But there are certain areas where they’re used a lot. Mount Arapiles in Australia for example. The first commercially produced micro wedges were called RPs, after their inventor Roland Pauligk. RPs are usually made of brass (as opposed to steel), a softer metal that deforms and “grips” the rock better.
You should always keep an eye on the nominal values of the wedges so you know what you’re dealing with and what you can subject them to.
Hexentrics
Because of the sound that the hollow nuts make, they’re also known as “cowbells”. Hexentrics are basically oversized, six-sided nuts for bigger cracks the size of a finger or hand. Hexentrics are great when they’re lightweight and inexpensive.
But they’re difficult to place and to remove. That’s why most climbers prefer cams to Hexentrics these days.
Hexentrics are particularly suitable to expand your selection of nuts and to double up on active hangers. They aren’t fully adequate substitutions for cams or Tricams. They have the positive properties of nuts (inexpensive, robust, lightweight) and expand your options for active placement. Sizes 1, 2 and 3 can be bulky.
When placed correctly, Hexentrics provide hold by twisting, not by using the taper of the crack. They can also stay in cracks with parallel sides, but they don’t cover all of their widths. Cracks with slight tapering where a nut wouldn’t hold, are not a problem either. Plus, you can find a spot along the taper where the width is just right.
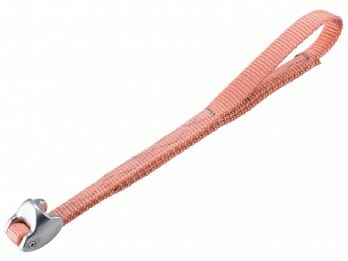
Tricams
These specific belay devices are part of a category between active and passive belay devices. Tricams are semi-circular metal wedges with a pyramid-shaped tip that are available in all possible sizes. They’re placed so they push into the rock like a cam (see below). They can also be positioned passively. They’re inexpensive and extremely practical when it’s difficult to place wedges or cams.
Cams
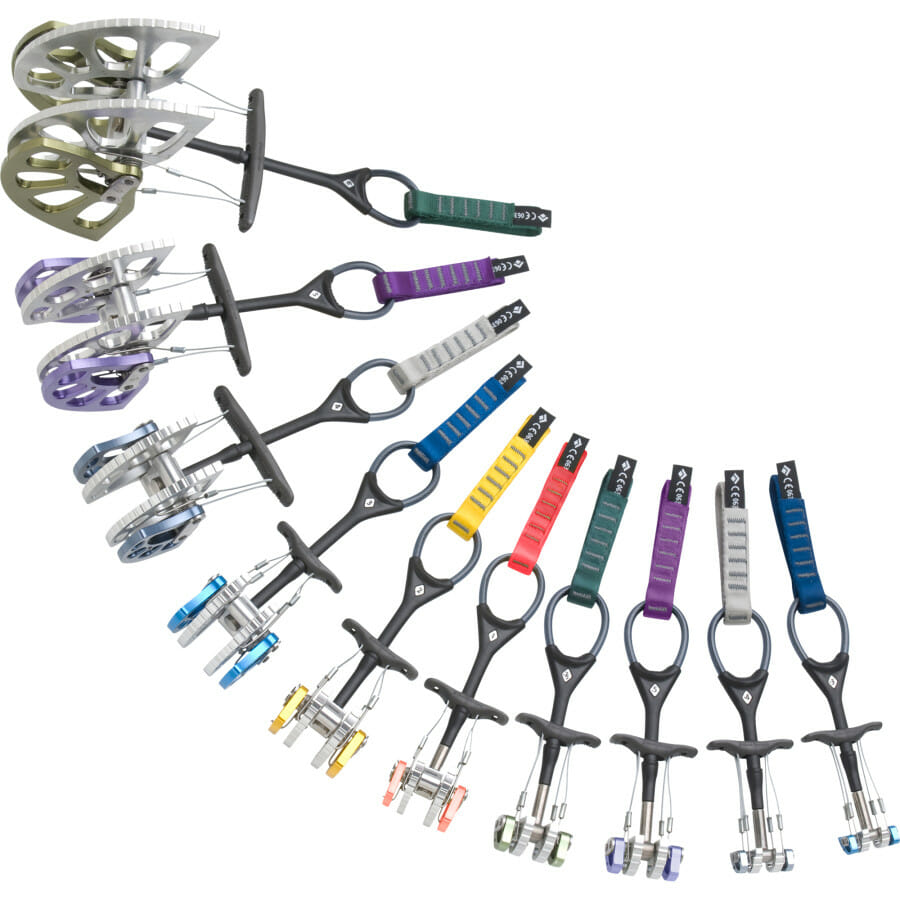
Cams, also known as “cams with a spring balancer”, are the classics when it comes to modern traditional climbing gear. Cams typically have 4 cam lobes on the axis at the head of the device and a trigger that pulls the cam lobes back so the head can be placed in cracks or to remove it again.
Cams are available in a great number of sizes. From mini cams that fit into the smallest crevices and cracks to gigantic cams that fit into crevices the size of chimneys.
Nowadays, all cams generally feature a flexible stem that can be bent into all direction. The older Wild Country Friends have a fixed stem, a design where you have to pay particular attention with (horizontal) placements. This is one reason why cams with a fixed stem will most likely be a thing of the past soon.
There are also cams with a simple stem, double stem and U-shaped stem, which all have their particular advantages and disadvantages. To name them all would go beyond the scope of this blog.
Micro cams
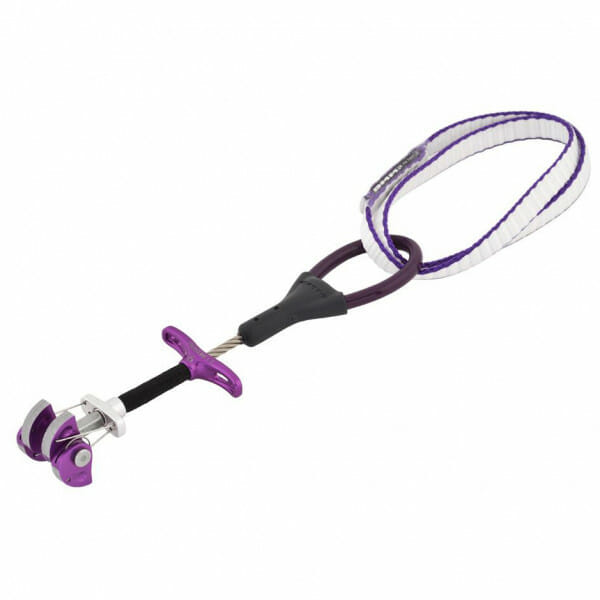
These are special cams that only feature three head wedges. They’re almost exclusively used for cracks the size of a finger. Thanks to their narrow profile, they can be inserted into narrow cracks.
Special shapes of nuts
The variety of shapes a rock face can feature is basically unlimited. These various shapes reappear in holes and cracks when we’re looking for where to position our trad climbing equipment. To certain extents, manufacturers can increase the “adaptability” of their nuts with geometric shapes. This creates specialised shapes of nuts for crack geometries where “conventional” nuts wouldn’t hold. But you just can’t be equipped with special nuts for every shape of crack – what remains are the shapes that fit most often.
Offset nuts
As opposed to the edges of conventional nuts, the edges of these nuts are usually straight. The important difference is, however, that they don’t just taper in the direction of pull but also vertically. This shape allows placement in cracks that expand towards the outside (unsafe when pulled outwards) and in tracks of former pitons (pinscars).
Additional essential traditional climbing gear
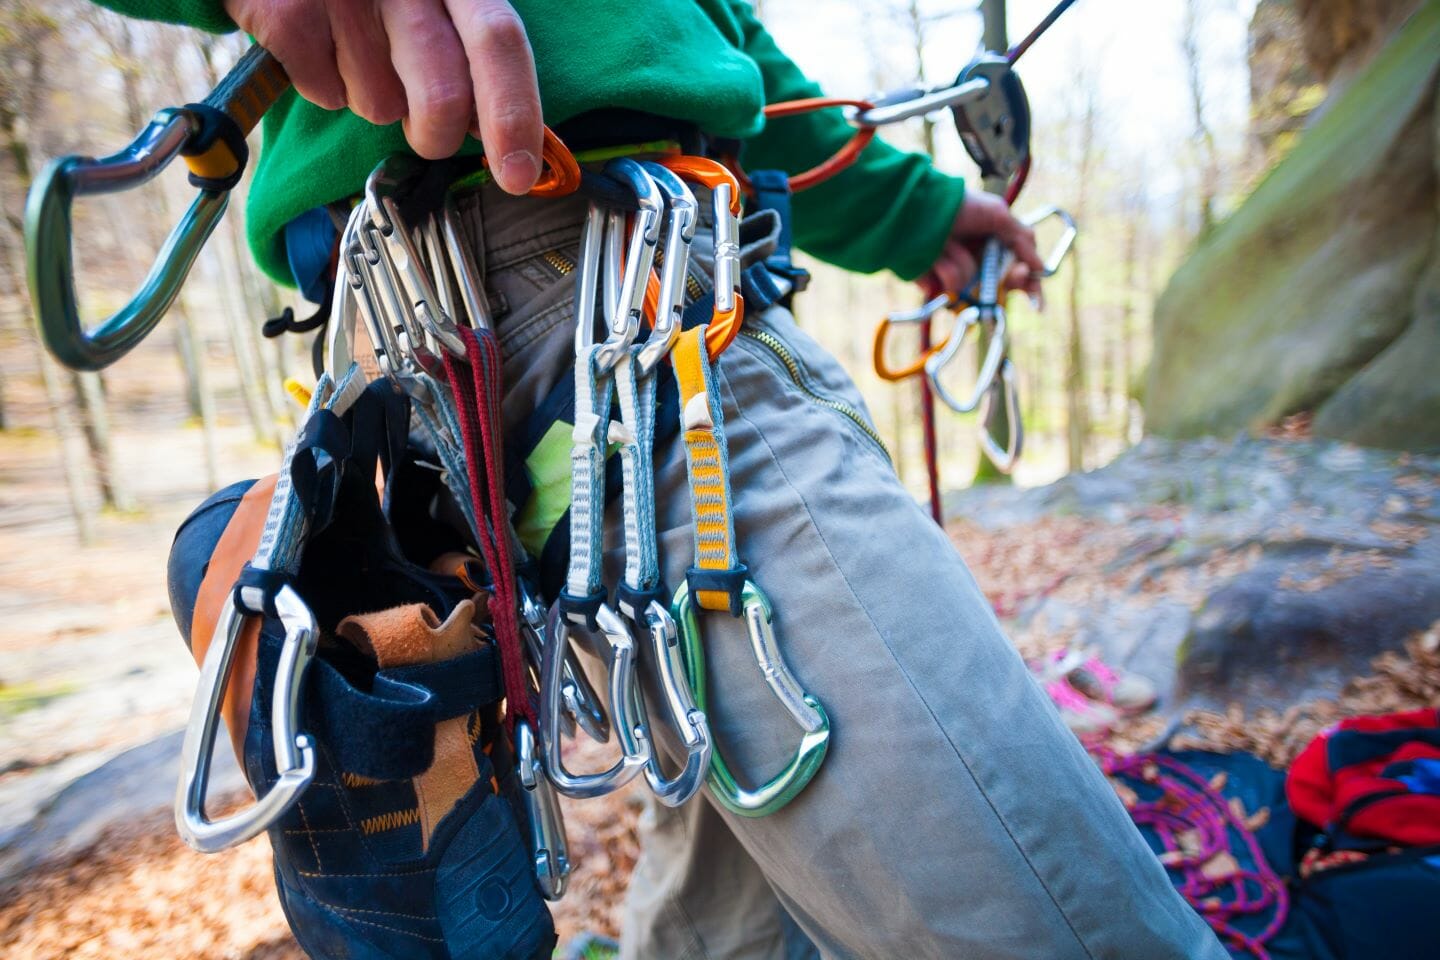
Carabiners
They’re available in all possible shapes, designs and sizes. All carabiners have one purpose: they give you the option to clip your rope to the mobile hanger that you’ve just placed.
Quickdraws
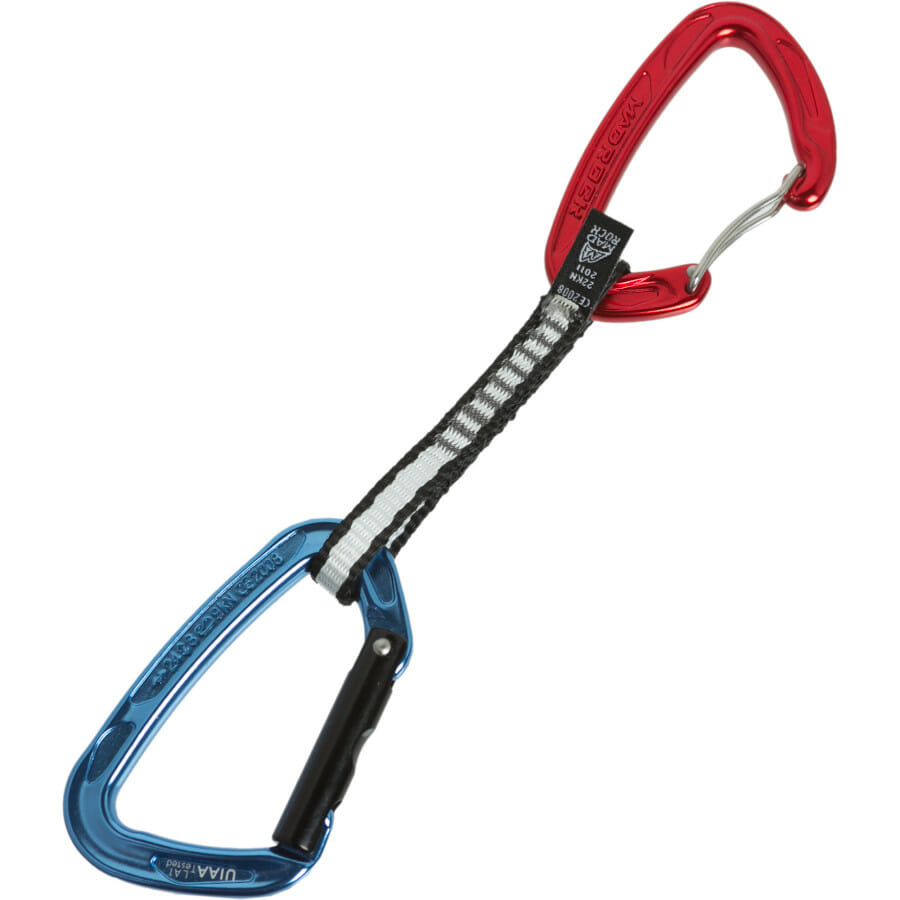
When you clip your rope into the hanger, it’s usually advisable to extend the connection so the rope doesn’t come unclipped when you’re climbing. A quickdraw sling, also known as “exe”, consists of two carabiners connected by a short sewn runner.
Cordolette/sewn runner
A very long sling, with a diameter of 180 to 240 cm, is used to compensate anchor points or to anchor your gear in the rock.
Nut removal tool
A metal part with a kind of hook at the tip which helps the second climber to remove firmly wedged nuts during second climbing. A nut removal tool is a simple accessory that shouldn’t be underestimated and must be part of your trad climbing equipment.
Tips for compiling your rack
Understanding sizes
A very confusing, sometimes frustrating part of trad climbing is to decipher the topo that is meant to tell you which sizes you need for the route. Unfortunately, there are no specific standards, meaning the different brands’ sizes aren’t the same. A #0.5 Black Diamond C4 for example corresponds to a 1 Wild Country Friend. The same applies to the colours that companies use to make things easier for us. This is the same as with our smartphones and other gadgets. We would love to have a universal charger for everything but that’s just not on the cards.
With descriptions for vertical crack climbing, the size is often specified in inches. If your topo says that, for a specific route, you need “4 #1s”, this might mean you either need 4 1-inch or 4 #1 Black Diamond Camalots. You must be aware that not all #1 (etc.) cams are identical. No matter what brand you choose, you’ll need to learn how to translate the information in your head.
What’s important for a rack to work?
It’s key that a rack continuously covers the crack width in the relevant area. The area itself will depend on the features of your climbing sections and the routes you want to climb. If climbing in areas with fist-sized cracks is not your thing, you won’t generally need hangers of that size. But if your area does feature lots of limestone holes the size of a fist, then several of this kind of hanger will be beneficial.
The areas covered by hangers in adjacent size ranges should overlap. The load capacity of mobile hangers is specified in breaking loads but their actual load capacity depends on the placement. Cams lose their stability in the upper range of their spreadability, which causes them to change their position in the crack. When load is applied, they can suddenly come out of the crack. But this doesn’t really have anything to do with the breaking load of the cam. The cam is perfectly fine. For this reason, you shouldn’t position cams fully spread. But if you place them fully folded, they’ll be hard to remove. I’d therefore recommend somewhere in between.
Furthermore, a gap will appear in the continuous coverage of the rack if you use a specific hanger further down. By increasing your overlap, you can mitigate these issues. When overlapping sets, there are model-related differences. What you’ll decide is down to your preferences and where you’re going.
Something that really influences the speed of choosing and placing the hanger is the way your equipment is attached to your belt. It’s worth checking how the sizes/lengths of the devices and models interact.
Tips for your trad climbing starter kit
At the beginning of your trad climbing career, you’ll need certain basic gear. In guides and topos, it’s often referred to as “single rack”. This equipment will be sufficient on many routes. The cost will be somewhere between €500 and €1,000. But this gear will then last for a really long time. And if you consider that others spend similar amounts every year for ski passes or new skis, you’ll soon appreciate how inexpensive trad climbing is compared with most other outdoor sports.
Please note that all trad climbing areas are different and not every “single rack” is suitable for every area.
Below, I’m giving my recommendations for setting up a starter kit with which you can ascend and descend most routes in most areas; when you’re climbing with a partner – which is standard really.
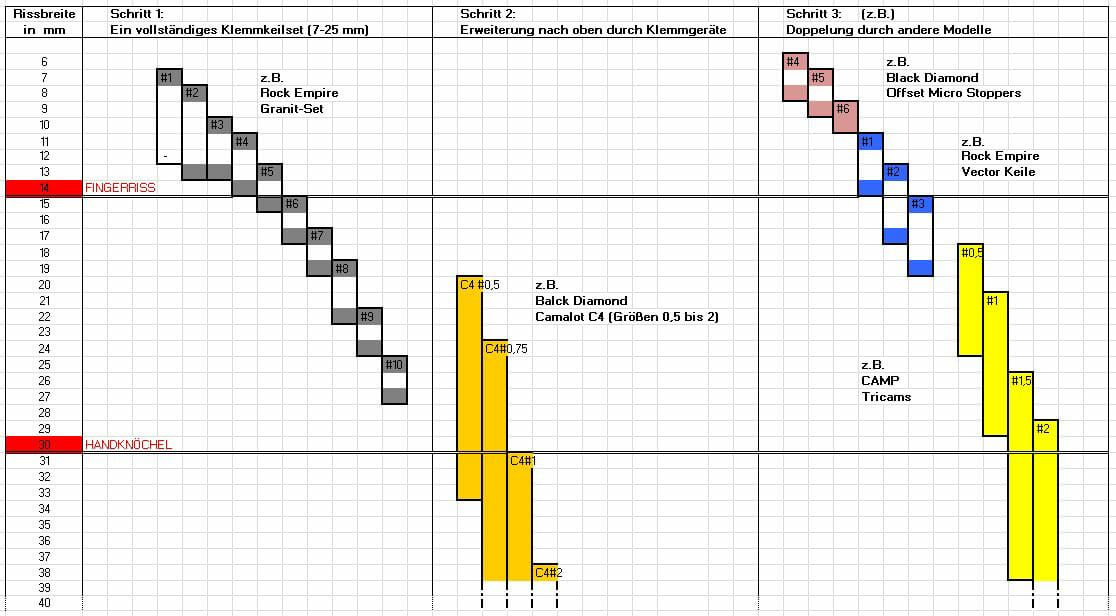
What order should you set up your rack?
Step 1: nuts
First, you should get a set of nuts because they’re the backbone of your rack and the most inexpensive belay device, yet very safe and relatively lightweight. If you have the choice between a cam and a nut of the same size (two placement options in direct proximity), go for the nut and save the more versatile cam for later. I place about 60% nuts and 40% cams according to this tactic. Initially, you should get conventional nuts (Black Diamond, Wild Country). Unusual shapes and offsets will become interesting at a later stage.
Nuts work as a set only (8 to 12 units) because they don’t adapt to the crack (passive). It’s therefore the climber’s task to choose the right nut. The finer the increments of your set, the better this will work, but the more the set will weigh as well.
As a beginner, you shouldn’t get anything below 5 mm width and 6 kN breaking load. This type of hanger will automatically fall into the category of “unreliable”. Very large nuts (over about 27 mm) aren’t even required by advanced climbers. Wider cracks are more effectively covered by other hangers.
Step 2: Active hangers
The second thing you should buy includes hangers that are suitable for active placement. This can be cams, Tricams or, to some extent, Hexentrics. If you don’t want to spend on a complete set, you can expand your nut selection upwards.
Step 3: Expansion and doubling up
Once you’ve gained some experience with hangers from 1) and 2), you may know what else you might need. If you want to double up on certain sizes, mix up different models to maximise their strengths. You can, for example, combine cams (quick to place) with Tricams (narrow – good for holes), or conventional nuts with offsets.