


That’s all well and good, but instead of more detailed information, you usually get advice first, like decide whether your tarp should serve as a sleeping area, a briefing area, sun shade or wind protection.
But, what if I want my tarp to tick off multiple items on that list? How about you tell me which knots to use for a particular setup instead? Yeah, there’s really no end to my list of complaints, so let’s just get started, shall we?
Keep it simple

Setting up a tarp may seem daunting at first, but the good news is: all you have to do is understand the basic setup and all your remaining questions will be answered (more or less)! Once you’ve understood the basic construction, it will be relatively easy to do, even with all the variations mentioned above. Assembly and disassembly should go off without a hitch.
To keep things simple, we’d like to teach you how to set up a tarp without all the poles, pegs, guy lines and the like. That way, you won’t be completely helpless if something breaks during your holiday. Plus, you’ll be able to leave all the little metal and plastic bits at home and save some weight as well!
The basic construction
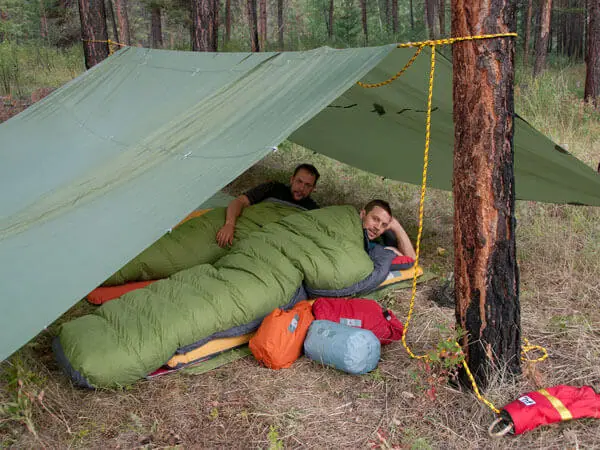
Here’s the basic construction: you have a square tarp with eyelets or the like at each of the four corners to which a long cord is attached. And a single person who sets it up. The tarp is spread out between four trees that just so happen to be standing about two metres away from the corners of the tarp. A short time later, the tarp is pulled tight between these trees, shielding you from the rain. This is the setup we’re going for.
Where to set up your tarp

The first step is to find a suitable place to set up your tarp. The same criteria apply to selecting a site for your tarp as for a tent: find a natural windbreak and avoid water-related issues. Other than that, the site should be spacious enough for you to sit or lie down comfortably and offer enough anchor points to secure the tarp.
The site should have at least four fixed points, or one cliff edge or the like along with three other anchors. If you only have three, one corner of the tarp will always flutter in the wind and/or hang in rainwater.
It’s always better to look for a potential site in advance than to find out later you don’t have enough space to put up your tarp or that the lines are too short and you have nothing to extend them with. Which is why you should know the dimensions of your tarp and the length of the lines!
This may sound trivial, but it’s not, especially if you borrow the tarp last minute or are travelling with a friend and use their tarp (the tarp set up with two or more people can make things easier or even super complicated – more on that later).
The setup: Spread out your materials
Once you’ve found your ideal site, spread out everything you’ll need for assembly and move anything that might get in the way off to the side.
Got your pegs and poles?

The best way to go about this is to make use of the things Mother Nature has to offer, especially since you can save the weight of your poles and pegs. The downside to using the little things you find along the way is that they usually don’t allow for as much flexibility as the artificial stuff. Not to mention, tent poles and pegs save you a lot of time.
When travelling in mountainous areas at higher altitudes, it can be especially hard to find suitable “tree constellations”, strong enough branches or enough heavy rocks. That being said, when planning your trip, you should definitely take the terrain into account as well. If you’ll be travelling for a longer period of time and don’t know were you’ll be setting up your tarp, you should take a set of at least one (telescoping) poles and two or three small pegs. If you have walking poles with you, you can use them as well. Pegs can be made using (sharpened) sticks and branches found in denser areas of the forest.
Guy lines
If you don’t have any (more) guy lines, you shouldn’t rely on the cords you’d find in a DIY or craft shop because they’re either not capable of withstanding the high stress, are often too stiff, don’t last very long or fray very quickly. Your best option is to use thin accessory cords with a 3-4 mm diameter (3mm accessory cords have about 1.8 kN or 180 kg breaking strength. Heavier loads would make the tarp itself more likely to rip than the cord). These cords can be cut to the appropriate length (melt the ends with a lighter to prevent fraying).
Paracord is also supposed to be well suited for tarps, and many survivalists swear by it, but since I don’t have any experience using them, I can’t confirm that claim. Due to my lack of personal experience with Paracord, the following comparison is based on theoretical impressions only: accessory cord is more static and has a rougher texture, which facilitates knotting and tensioning. However, opinions vary widely on this topic. My personal opinion: you probably won’t even notice the pros and cons of either one in 90% of tent configurations. If you’ve had experience with both, feel free to leave a comment below.
Spread out your tarp
Spread out the tarp and the guy lines as smoothly and neatly as possible – toward the anchors you’re going to secure them to. If it’s raining, you can already slip your backpack or other unneeded material underneath the tarp to keep them dry. If it’s windy, weigh down or secure a corner of the tarp first, or even better: the entire side facing the wind.
Then lift the corners of the side facing away from the wind one after the other and secure them. Since a tarp is usually not built to withstand strong winds, it should lie relatively flat in really windy conditions. The side facing the wind should then extend all the way down to the ground to prevent the wind from getting through.
Anchors
Here’s some more good news: almost anything that has some weight to it can be used as an anchor, be it larger rocks, roots, cliff edges, fences, poles driven into the ground or even a bag filled with something heavy.
You can secure the tarp to your anchor by either tying a knot within the anchor point or by wrapping it around it and then tying a knot. Both options require knots that can be tied under tension and remain in position without slipping.
Knots

The knots you use should be as easy to tie, adjust and remove as possible. The knot you choose to use depends on the situation.
Fortunately, for most situations, there is one do-anything super-knot. With this super-knot, you can secure, adjust, move and loosen almost any rope or cord without any additional tools – even around huge anchors.
If you haven’t figured out which knot it is yet, it’s high time you acquainted yourself with the clove hitch. Most climbers and mountaineers have mastered this knot anyway, since it is used for fixing climbing anchors and crevasse rescue as well as all sorts of other situations. It can be placed directly around tree trunks, branches, stones and other anchor points.
Make sure you’ve really mastered it though, meaning you can tie it upside down, in the dark or even blindfolded. The clover hitch is the simplest knot for setting up a tarp and has the fewest weak points.
In some situations, though, tying a clove hitch can get a bit awkward. For example, when tying a line around a tree, as shown in the video, the taut line hitch knot recommended by the tarp manufacturer Hilleberg may make more sense.
It is easier to adjust and release. However, the knot shown by Hilleberg with its additional loop is actually a taut line hitch plus a loop knot. Without this extra loop, it is not easier to open than the clove hitch. And the loop must be opened to move or adjust it.
In short: the taut line hitch is best for use on lines under tension. It is great when the length of a line needs to be adjusted periodically in order to maintain tension as well.
In general, the tarp setup should be as simple as possible and require as few knots and as little material as possible – which, as was already mentioned, always constitute weak points in the structure, even though it goes without saying that extras, such as adjustable line runners, are very useful and convenient for more complex and high-quality tarps like those from Hilleberg.
One anchor point after the other
With the help of the two knots mentioned above, you can set up your tarp basically however you want and even adjust the height if necessary – pretty cool, right? As a rule of thumb: after each step, add some tension to the setup so that it can withstand gusts of wind, but leave it loose enough so that the tension doesn’t hinder your next step.
If you’ve got your line, your eyes on the anchor and have mastered the knot, the procedure is almost self-explanatory: you secure the tarp to the anchor points one after the other, adding some tension along the way before you finally pull the tarp taut to the desired angle and the correct height. The worse the weather, the lower and the flatter the tarp should be.
Setting up a tarp with walking poles
If you only have fixed points on the ground, use poles. First attach the tarp relatively loosely to the pegs or other fixed points on the ground, then slip the poles under the tarp to prop it up and get it in position. For stability and good use of space, the poles usually have to be pushed back and forth and the angle adjusted.
Drive the tips of walking poles into the ground whilst keeping the grips in close contact with the fabric of the tarp. Then make minor adjustments to the anchors on the ground by shifting the clove hitch knots. Pretty self-explanatory, one might think. Well, believe or not, some people set up the poles first and then wonder why everything collapses when they try to secure corners…
Possibilities, possibilities…
A tarp has a lot of possibilities, but here’s our short summary of what we find important:
- When setting up your tarp, make sure that the sides are not the same height – otherwise rainwater could accumulate on the tarp. The slanted roof can be set up with the help of trees, poles or a cord stretched across. The open, unprotected side can be used for easy access to your campfire.
- The tarp must be taut enough to avoid fluttering or “sagging” in the wind, as rainwater could accumulate here as well.
- If it’s going to rain, you should build a little drainage channel whilst setting up your tarp so that the water flowing down cannot get underneath the tarp.
- (Walking) poles are very well suited for making ridges. By the way, we also recommend using another kind of mat or pad to put under your sleeping mat for protection from moisture and dirt.
Great roof design
The ridge gives you an array of possibilities, especially if you have a larger or hexagonal tarp. It allows you to divide your tarp up into two or more “sections”. The ridge is a line formed by the surfaces at the top of the tarp, creating sloping sides to allow the water to run off and to reduce the shaking caused by strong winds.
High-quality tarps such as those from Hilleberg usually have eyelets or the like with guy lines at the corners and on the sides for more options.
First, take the corners and add tension as you normally would. Then, pull the tarp to the desired angle and add tension to the centre of each side, and your ridge is finished. If there are no eyelets for this purpose, you can use a separate cord instead and pull it underneath the tarp along the desired line. Of course, you would need to select your anchor points for this extra line beforehand.
Setting up a tarp higher up

If you want your tarp higher up, you should ponder the following questions: Do you want to be able stand upright under the tarp and/or have enough room underneath for a fire? If the answer to these questions is a yes, then tie the end of the guy line(s) to a peg bag with some pegs in it for added weight and throw it over a high branch. Hopefully, you’ll be able to pull the bag so that you can secure the tarp using a clove hitch to another anchor point at ground level.
If you can reach the higher anchor point safely by climbing, you don’t need to worry about the second one. Alternatively, the end of the line can also be wrapped to a tree using a walking pole or branch. Try to prevent the line from rubbing up against the bark – for the sake of the material and the tree.
Improvisation
If there aren’t any eyelets or the like (e.g. because they’ve been ripped), you can bunch up the material into a sausage-like shape in the appropriate place and tie it together with a square knot. You can then use the opening for your guy line. The easiest way to attach them is by tying a square knot.
If two lines have to be connected (e.g. for extra length), these can be connected with a square knot with a loop in it. With the extra loop, the knot can be released, even under heavy loads. The Hilleberg video above illustrates this very nicely. Of course, it’s always better to have a few guy lines that are long enough to suit your needs.
Taking your tarp down
Taking down your tarp is just as important as setting it up. Let’s assume the following: you’re travelling with two or more people, have a larger, hexagonal, trapezoidal or otherwise oddly shaped tarp and have to take it down in bad weather. If possible, you and your mates should know well in advance, i.e. before taking it down, how you plan on folding it, if it should be folded at all and who’s responsible for what.
If you don’t figure out everybody’s roles beforehand, you’ll end up barking orders at one another whilst getting pelted by wind and rain. So, plan in advance, work together and most important of all: have fun and enjoy the beauty of the great outdoors!


About to enter the wild(ish). Thanks for the top advice! x
Fantastic! It was the best post to guide about the whole process.
Great article! I have used both accessory cord and Paracord; Paracord does not hold knots an well, especially the tautline hitch.