

Another pretty significant part of these costs: all the equipment that’s necessary for a climb like this. I got a lot of things wrong. Not just because I was short of funds but also because of my lack of experience. I would like to share my experience here – in the hopes that my information may be helpful to any prospective Kilimanjaro climber.
Mount Kilimanjaro – Africa’s highest mountain
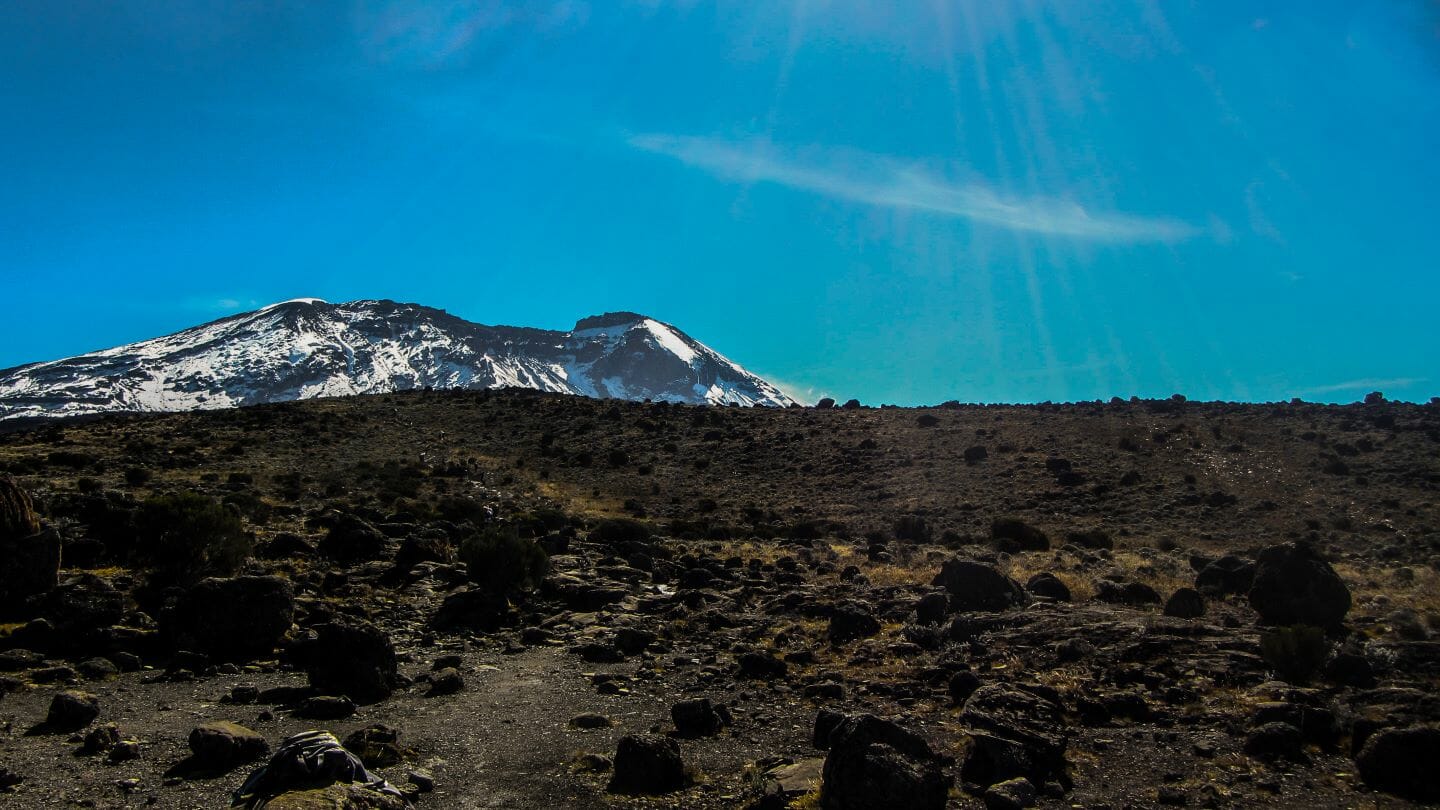
The biggest challenge for the climber and the equipment is the height of this elegant volcano. This must not be underestimated. You don’t just have to get your body to a height of around 6,000 m (which is even higher than Everest base camp) but you have to cross five different climate zones:
- cultured forest used for agriculture
- mountain rain forest from 1,700 m to the tree line
- the Alpine level starts around 2,800 m and first leads through pastureland as well as steppe region characterised by heather
- from 4,000 m, you’ll cross what is known as high-altitude desert (barren and rocky, with big temperature differences between day and night) up to about 1,000 m below the peak
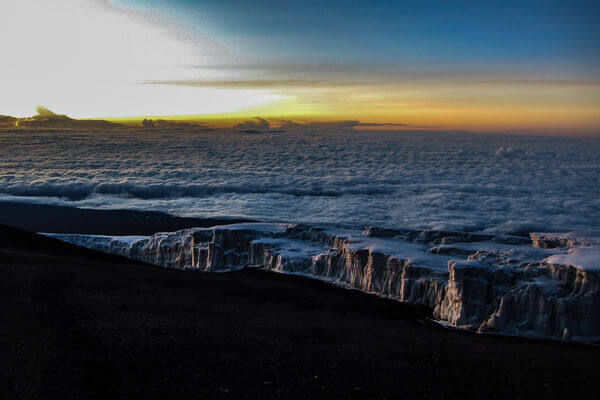
- the actual summit region is at snow level, i.e. where snow, glaciers and summit craters populate the area
Choosing a suitable route for the Kilimanjaro hike
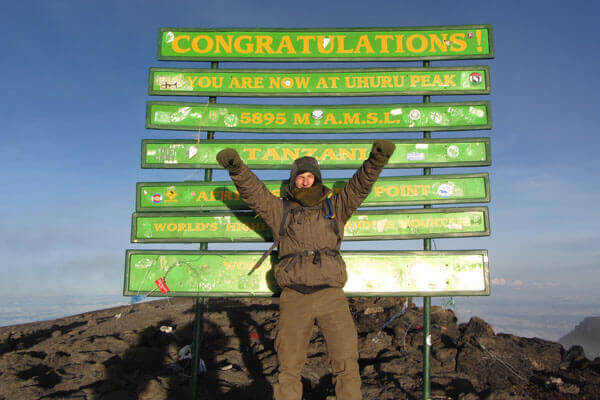
Of course, you can’t climb Kilimanjaro in one go. That would be too much for non-acclimatised Central Europeans. Instead, depending on the chosen route, you go up in stages, back down a little, up a bit more the next day etc. Following the Tanzanian motto “Pole, Pole” (slowly, slowly), you make your way in five to nine days to Uhuru Peak. The longer routes in particular lend themselves to this method with a dual purpose: not only for the varying scenery but also for the much better opportunities to become acclimatised.
So, we chose the 7-day trip via the Machame Route – also known as the Whiskey Route – which was used less frequently at that time. It may be more physically demanding because it’s longer (and a little more expensive), but you have better chances of reaching the summit. 9 of 10 people from our group managed to do so.
Equipment? What exactly do you need?
During the night at the summit at the latest, I became painfully (whilst shivering) aware what I could have done better. Some may say “typical rookie mistake”, others “That was obvious”. But these are exactly the types of mistakes you learn from. A lot of questions we receive concern the following:
- How cold will it get? What clothing is recommended, not just for the rain forest stages but for the day at the summit in particular?
- What comfort limit should my sleeping bag have? Which sleeping mat is suitable?
- What about tents and supplies?
- And last but not least: Water bottle or hydration system?
Of course, these are just some of the questions you must ask yourself in advance. But finding the answers isn’t always easy. That’s why I want to provide some guidelines that don’t claim to be complete but would have made my life easier.
What clothing should you pack? What would be nice to have?
A look at my packing list shows one thing in particular: Dress according to the onion principle and don’t take too much stuff! Several Merino T-shirts, several Merino long sleeve shirts (material thickness 200 g/m²) and a windstopper softshell jacket. Plus, bring trekking trousers with removable legs. These are the basics that should tide you over the first few days without problems. Merino clothing in particular dries quickly and doesn’t generally smell. A clear advantage for spending the nights in a tent.
It gets interesting, however, when transitioning from 3,000 m into the windswept high-altitude desert of Kilimanjaro. Vegetation offers little protection here so you’re at the mercy of the wind and, if you’re unlucky, of the rain. Windproof outer clothing definitely helps as well as a buff that you can pull over your face when needed. Your (lightweight) waterproof jacket should be stored in your touring backpack within easy reach.
Shoes!
Ooops, I almost forgot the shoes. I’m often asked whether you need rigid trekking boots to climb Mount Kilimanjaro. My answer is no. A good pair of (worn in!) mid-cut walking boots from Category B is sufficient in my opinion. This climb is considered more extensive high trekking so the heel-to-toe movement, comfort and breathability of the boots must be right. A pair of Hanwag Banks GTX worked for me. Those who stay in the country a little longer, for example, to go on safari, should pack a lightweight pair of airy shoes in addition to 3-4 pairs of socks.
Now let’s get to the nitty-gritty: everything above 4,000 m. This is where I made the biggest mistake and didn’t buy myself a down jacket because I didn’t have enough money. This was really going to cause me a great deal of discomfort, on the last evening before the summit at the latest and on the way to Uhuru Peak itself.
While I shivered on the way to the summit in an abstruse combination of T-shirt, long sleeve shirt, fleece jacket, another fleece jacket, windstopper jacket and an additional hardshell jacket on top, the others could hide in their comfy down jackets. So please make sure you take a down top! Not one of these Michelin man monstrosities costing 800 Euros, but at least one from a mid-class price range that takes up little space when packed, with 650 to 700 cuin fill power. This should prevent you from getting too cold.
Also handy
Long johns are definitely nice to have on a Kilimanjaro hike. Again, Merino wool, 200 g/m², has really paid off – a huge advantage in the sleeping bag or on the way to the summit. In addition, I recommend a synthetic fibre skirt for those who might like it. It can really increase the feeling of comfort when everyone is sitting together in front of the tent in the evening with a delicious, hot cup of tea in your hand.
There’s only little to say about things like gloves and beanies. You should certainly not forget them. A warm, comfortable wool beanie under the hood, a pair of windproof gloves insulated with PrimaLoft for example and nothing should get in the way of your last stage up to the roof of Africa. Apart from the altitude of course. But each person reacts differently to this phenomenon. If you notice any symptoms of acute altitude sickness, you mustn’t ignore them. It’s better to be safe than sorry. Abandon the peak but return with your health instead. This was the case for one woman in our group. It was a brave decision and who knows what it was good for. Our mountain guide has experienced various cases where he and his helpers had to cart climbers down the mountain with oxygen bottles.
You made your bed, now sleep in it
Speaking of sleeping: My Mountain Hardwear synthetic sleeping bag with a comfort limit of 1 °C and a microfibre inlet was OK for me. However, this certainly won’t do for anyone who is sensitive to the cold. If you want to be on the safe side, you should choose a synthetic sleeping bag with a comfort limit of -2 °C or just below. At warmer altitudes (keyword sweating; moisture), you can just leave it open. Higher up Kilimanjaro, you’ll be happy to have a draft collar.
Of course, the question is why you wouldn’t take a down sleeping bag. In general, I think that’s a good idea but in my case, the price was the deciding factor. Down is more lightweight, it offers more efficient insulation in relation to the weight and it compensates body temperature with the great differences when you climb Kilimanjaro in particular between Camp 1 and Camp 5 – but it does cost more. So in the end, it’s a question of budget. In both cases, you should consider a -5 °C to 0 °C comfort limit. Use an additional inlet for colder nights higher up.
Sleeping mat
Those who don’t want to sleep on a Therm-a-Rest Z-Lite Sol folding mat, should consider a self-inflating sleeping mat. I chose the Exped SIM Lite UL 3.8 – a good compromise of pack size, weight and insulation capacity. With its R-value of 3.2, it can be used to about -5 °C. Again, you need to consider whether it’s worth getting a thinner and therefore lighter mat but risking being cold at higher altitudes and low temperatures or when the ground is frozen. Or the other way around: if you don’t want to take any risks, the mat should be 4 to 5 cm thick.
The tents (at least as far as I know) are generally provided by the organiser and carried by your very own porters to the individual camps. At least, you don’t have to worry about that.
On the subject of supplies and drinking water
Although it’s not really part of “by fair means”, the majority of the supplies are also lugged to the individual camps by the porters. Although I believe that I should carry everything I need to the top and back down, the rules when climbing Mount Kilimanjaro are different. You wouldn’t be able to do anything without the porters. It may be a good thing because the strictly regulated tourism at Mount Kilimanjaro is often the only source of income for many Chaggas who support their families in this way.
Small snacks for in between
Besides energy bars, you don’t have to worry about trekking supplies or similar for the individual daily stages. There’s usually a small breakfast and a warm meal in the evening with potatoes, meat and rice. When getting hungry in the meantime, I absolutely swear by Clif Bars. Those who, understandably, think that they’re too expensive, should try Oatsnack oat bars – small energy packs that even taste nice and don’t melt quickly.
And finally: drinking water. Let’s look at this comparison: Person 1 carries a hydration system with a capacity of three litres in a backpack. Person 2 has a standard 1-litre water bottle in a side pocket. Who will drink more or more regularly? The answer is obvious and needs no further explanation. My Camelbak hydration system only had one issue, or rather it was my fault that I didn’t think of taking an insulation tube. That resulted in me sucking on a frozen bite valve for the whole night on the way to the summit. Only when the sun came up was I able to watch with excitement as the water in the tube changed its physical state back towards drinkable.
Still, the water supply during the Kilimanjaro hike is excellent and guaranteed by the porters. All you have to do is make sure you fill up your daily reserves. 3 to 4 litres of water per day are basically needed and recommended for adequate acclimatisation. If you’re clever enough to realise that water may freeze at temperatures below zero and you take appropriate precautions (I don’t mean replacing water with high-percentage alcohol), you will have an easier time. Most hydration systems are available with matching winter kits featuring insulation tubes.
What will you definitely not need?
You can read a lot about all the things you’ll need on a hike like this. But it’s almost more important to work out what you don’t need! When you climb Kilimanjaro, there are all sorts of things that can stay at home. To cut a long story short, here’s my Top 5 of items that you simply don’t need:
- heavy-duty trekking boots (Category C-D) and more than 3 pairs of socks
- gaiters of any kind (I lugged them around pretty much for no reason the whole time – but OK, short, lightweight, breathable gaiters may help against fine volcanic dust)
- more than one pair of quality walking trousers (with zip-off legs -> universal)
- more than two T-shirts, two long sleeve shirts, one fleece and one down jacket
- mobile phone, smartphone etc. – there’s no reception anyway on the hike. Instead, take a quality camera with spare batteries
With all this in mind, I hope all aspiring hikers have a great ascent and safe return from Kilimanjaro.


