

With a good plan, you’re half way across
Of course, you shouldn’t plan every single little detail of a trip. After all, adventure, spontaneity and surprises are what make outdoor activities so exciting. But that doesn’t mean that you should leave crossing a river up to chance. They’re often in key locations that you can’t avoid and failing may mean an early end to your whole trekking journey.
That’s why advance research concerning water levels and favourable fording sections is advisable in particular when exploring remote areas that are not very developed. If you have found critical water crossings on your route, you can identify possible diversions and alternative routes from the comfort of your home. When you start your trip, you can ask other hikers, hut keepers or park rangers, if there are any, for the latest information.
When should you attempt a river crossing?
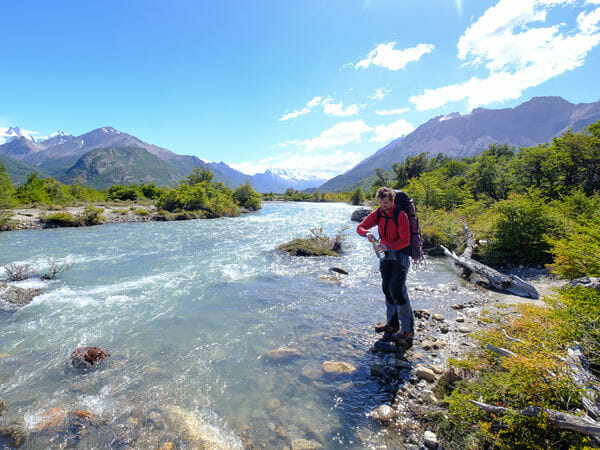
Time and location play a key role, of course, in particular in the mountains and close to glaciers. Both seasonal fluctuations in water quantity and those related to the time of day can be immense. Reasons not only include rain and melting snow but also geo-thermal activities in areas of volcanic activity.
On one of my adventures, water level fluctuation related to the time of day meant I was faced with my own trickiest river crossing so far. Early in the morning, a glacial stream was up to about half my calf. No problem. I didn’t even need the two branches I brought as supports. But since I planned on returning the same way in the afternoon, I placed them carefully in a crevice. (If a branch is longer than you and robust, one is enough. But these were shorter and less strong, so I used two.)
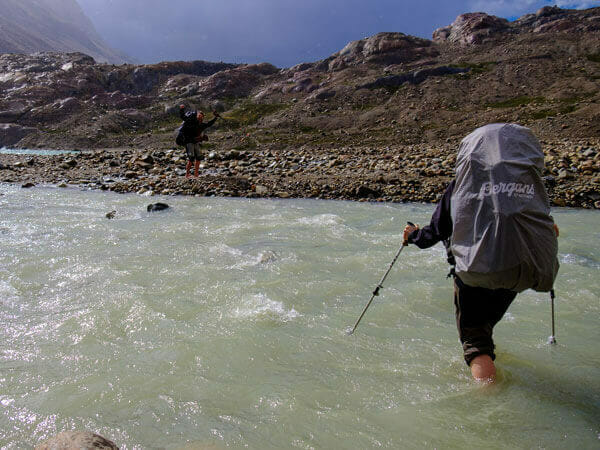
As expected, the stream had swollen in the afternoon. That was obvious, but the fact that the water went up to my waist in the middle was a surprise to me. Unfortunately, only one of the branches was still there. Would someone have stolen the other one? …
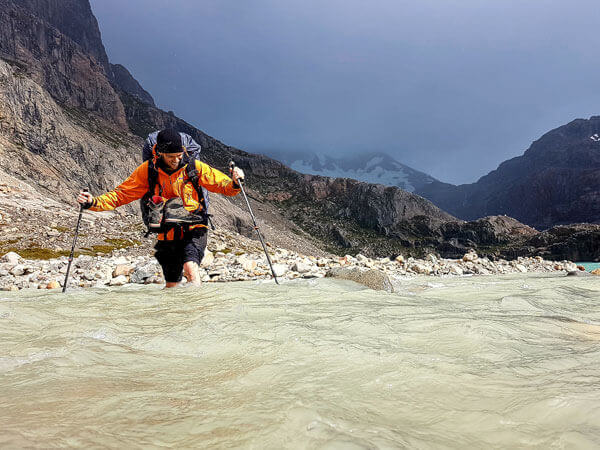
Be that as it may, it went relatively well with one branch up to the middle. But then the current pulled the right Croc (those practical rubber shoes) from my foot even though I had done up the strap. I lost my balance for a split second while my naked foot tried to find some stability on the pebbles, and I nearly took a dive that would have ended, at the earliest, in a small lake a few hundred metres downstream. I only managed the rest of this ordeal with huge effort.
What can we learn from this? Well, streams that are supplied with melt water should be crossed as early as possible in the morning. But as you can see, you can’t always time it right. Sometimes, you may even have to take an unplanned break for the night. And: walking poles aren’t just there to preserve ageing knees. Once a militant objector to poles, I would never go trekking in remote areas without them these days.
Bad timing and other mistakes: Chris McCandless
The most well-known, spectacular and somehow most preventable death caused by a failed river crossing must be that of Christopher Johnson McCandless. After his death, McCandless became world famous as a tragic hero in Jon Krakauer’s bestseller “Into the Wild”.
His last journey took McCandless to an old school bus which was just gathering rust in Denali National Park in Alaska. A river that McCandless was able to cross easily when he arrived, had turned into a torrent because of the summer’s thaw, meaning he was no longer able to wade through it on his return. “What turned out to be fatal was that he didn’t have a (detailed) map. This would have shown him that there was a hand-operated floating ferry across the river around 400 metres downstream – as well as several huts (some run by the National Park’s Administration) a few kilometres to the south. McCandless returned to the bus, hoping that he could hang on until help arrived, mainly owing to the upcoming hunting season.”
But nobody came to help and McCandless died after 113 days alone in the wilderness of causes that were never fully clarified.
Where to cross?
Sometimes, you don’t have a choice because of the terrain. Then it either works there and then or not at all. But if the terrain allows, you should look for the most convenient section, of course. This may be where the river branches out or where it may be wider, yet current and water depths are more favourable. If there is a gentler current, even deeper water can be crossed more easily. But be careful: these “stagnant” areas may feature deep sand or mud. Ideally, a long wading pole will help here so you can feel the way ahead.
Sections described in guides may no longer be of use even after a short time because natural bodies of water constantly change their bed conditions and their course, in the mountains in particular.
The British Mountaineering Council recommends never to attempt river crossings ahead of a waterfall. Well, that makes sense. This also applies to rapids and steps. In addition to obvious risks, there may also be concealed surprises: if there is a strong current, large boulders can move across the bed and upset your balance.
As the British Mountaineering Council notes, it’s important to check the river for obstacles: “Downstream obstacles such as trees, waterfalls and boulder chokes may prove killers if anybody is swept away.”
Check before getting into the water
Before you start crossing the river, you must briefly check your equipment. Are all important items that are sensitive to water sealed to protect them from getting wet? Do you have a change of clothes in case of an emergency? Is your backpack’s centre of gravity too high?
Wearing shoes is a must. They should protect your toes and fit your feet securely. Crocs may be versatile, lightweight, waterproof and generally suitable but they must fit securely. Otherwise, they may escape after all – see above. Crossing a river in trekking boots is not a good idea unless you have the time and the weather to dry them. Just tie them to your backpack so they can’t come loose and don’t upset your balance.
Leave the backpack’s sternum strap open so you can quickly take it off if you fall. A common recommendation is to leave the waist belt open as well but there are also opinions to the contrary. In his reference book Outdoor Practice, Rainer Höh writes that a backpack with open straps can easily slip during sudden movements, thus jeopardising balance. If you are well prepared, Höh believes that the hip buckle can be opened quickly enough.
There is no single golden rule because a backpack may push your head under water in an unfavourable position but it wouldn’t usually sink because of the air chambers inside, and could therefore actually act as a flotation device. You should certainly not sacrifice it too easily because the loss of all your luggage may be worse than an involuntary bath.
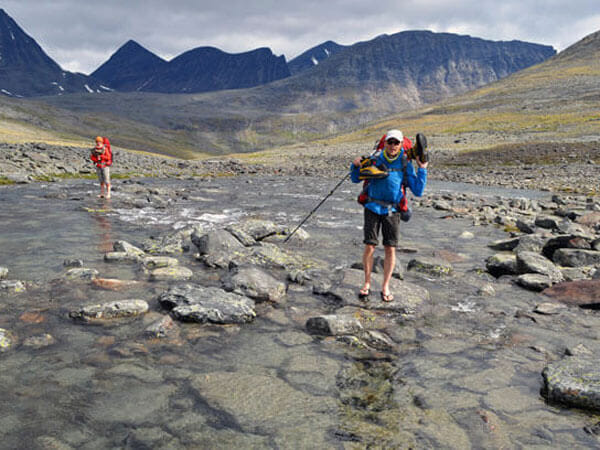
How to cross Tips for fording
At the latest when the water reaches your knees, start advancing slowly with your pole/s and make sure you have secure footing. The following tips are from Rainer Höh’s book because advice from blogs and fora sometimes contradicts each other and doesn’t clearly differentiate details such as line of sight and walking direction.
Höh recommends walking at an angle of about 45° downstream with your head facing upstream. To ensure ideal balance, stand diagonally to the current or slightly sideways, with the front leg offset downstream.
Position the wading pole upstream about a metre from your body and lean against it. The tip of the pole and your feet should form a triangle (with two walking poles, you can form a rectangle). If you placed the pole/s downstream, you would be in an unstable position when you move them next.
If several people want to help each other, the stronger person shouldn’t try to support the weaker person from downstream but “cushion or absorb” the current from upstream. Otherwise, there’s a risk that both will fall in the water if balance causes a problem.
If there are three or more people, you can wade together by holding a long, strong pole and advancing diagonally to the current. The pole therefore moves parallel to the current. The heaviest person should act as an “anchor” downstream, with the lightest person being the “current breaker”. If the latter loses balance, he or she can hold on to the pole. There is still a risk that the whole group loses its footing but the bigger the group the less likely this scenario.
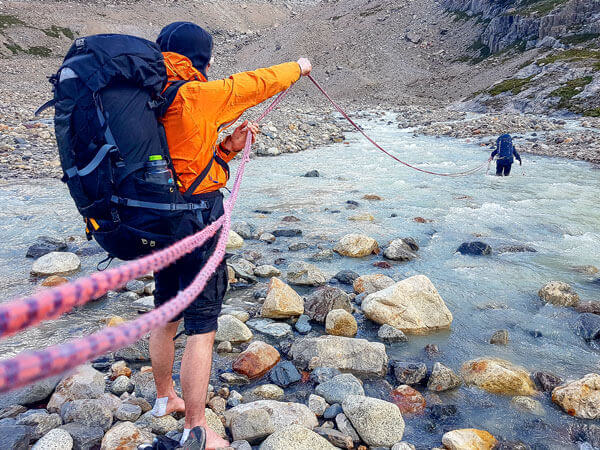
Wide and deep: fording with the help of equipment
Walking poles or a long, strong branch of about two metres in length are essential parts of the basic equipment for crossing a river. They’ll suffice if the water comes up to hip height and there is no strong current. Anything deeper than that will also push over the strongest person. A river crossing is then no longer possible without technical equipment. A rope brought specially for this occasion can be such a tool.
In theory, a rope can be used in many ways but in practice, it sometimes helps surprisingly little. Problems can become quite complex and crossing a river can become a science.
It includes a lot of shop talk about pendulum methods that involve securing the rope to a tree or another fixed point as far into the middle of the watercourse as possible, and then wading through the water in a pendulum movement, whilst being secured to said object. Performing such an action where you’d have to guide the rope at the same time as wading is often difficult to impossible. Rainer Höh has dismissed such self-securing methods as “nonsense” …
In other rope methods, such as the rope bridge, the problem is that the rope has to get to the other river bank without the help of a rope and be tied up there. Another disadvantage of the rope bridge is that it requires a static rope. A climbing rope would sag too much when subjected to the weight of a person, no matter how tightly it’s tied.</
And even with a static rope, the construction would allow little more than transporting a backpack. Furthermore, with increasing river width, it gets harder and harder to pull in the rope that is hanging in the current. You would have to use a thin line to pull in the rope after the river crossing.
A rope railing would be a construction that is easier to implement. This rope that is taken across and tied up by the most experienced/strongest person can be used by the others as a railing to hold on to. They could also secure themselves to the rope with a carabiner (connection via the short part of the rope under the arms or sternum strap).
Other equipment such as self-built rafts are more suitable for educational adventure activities that would only offer a realistic ratio of effort to result for extreme wilderness enthusiasts. However, a small raft that only carries luggage which you swim next to can be built quite quickly. But instructions to build a raft would go beyond the scope of this blog. It may be worth a separate blog in the future…


